Replacing cutting tools on a heavy duty lathe is a crucial task that requires careful attention to detail and a solid understanding of the lathe’s operation. As a heavy duty lathe supplier, I’ve encountered numerous customers who have questions about this process. In this blog, I’ll share my expertise on how to properly replace cutting tools on a heavy duty lathe, ensuring optimal performance and safety. Heavy Duty Lathe
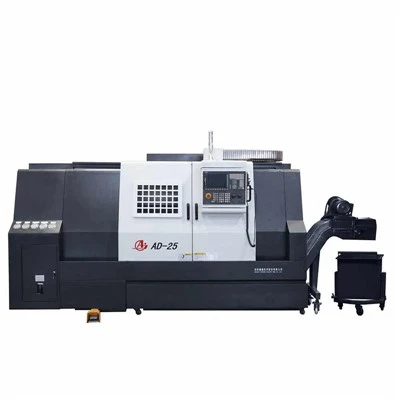
Understanding the Basics of Heavy Duty Lathes
Before diving into the tool replacement process, it’s important to have a basic understanding of heavy duty lathes. These machines are designed to handle large and heavy workpieces, making them ideal for industries such as manufacturing, automotive, and aerospace. Heavy duty lathes typically have a larger spindle bore, higher horsepower, and more robust construction compared to standard lathes.
The cutting tools used on heavy duty lathes are specifically designed to withstand the high forces and pressures generated during machining. These tools come in a variety of shapes and sizes, depending on the specific application. Common types of cutting tools include turning tools, boring tools, threading tools, and milling cutters.
Preparing for Tool Replacement
Replacing cutting tools on a heavy duty lathe requires careful preparation to ensure a smooth and safe process. Here are the steps you should take before starting the tool replacement:
1. Gather the Necessary Tools
Before you begin, make sure you have all the necessary tools on hand. This includes wrenches, calipers, micrometers, and any other tools required to remove and install the cutting tools. It’s also a good idea to have a clean, well-lit work area to work in.
2. Shut Down the Lathe
Safety should always be your top priority when working on a heavy duty lathe. Before you start replacing the cutting tools, make sure the lathe is completely shut down and the power is turned off. This will prevent any accidental start-ups and reduce the risk of injury.
3. Remove the Workpiece
If there is a workpiece on the lathe, carefully remove it and set it aside. This will give you more space to work and prevent any damage to the workpiece during the tool replacement process.
4. Inspect the Lathe and Tools
Before installing the new cutting tools, take a few minutes to inspect the lathe and the old tools. Look for any signs of wear, damage, or misalignment. If you notice any issues, address them before proceeding with the tool replacement.
Removing the Old Cutting Tools
Once you’ve completed the preparation steps, it’s time to remove the old cutting tools from the lathe. Here’s how to do it:
1. Identify the Tool Holder
The tool holder is the device that holds the cutting tool in place on the lathe. It’s usually located on the cross slide or the compound rest. Identify the tool holder that holds the old cutting tool you want to replace.
2. Loosen the Tool Holder Clamp
Using the appropriate wrench, loosen the tool holder clamp to release the old cutting tool. Be careful not to drop the tool or damage the tool holder.
3. Remove the Old Cutting Tool
Once the tool holder clamp is loose, carefully remove the old cutting tool from the tool holder. Pay attention to the orientation of the tool and any shims or spacers that may be used.
4. Clean the Tool Holder
Before installing the new cutting tool, clean the tool holder to remove any chips, debris, or coolant. This will ensure a proper fit and reduce the risk of vibration or chatter during machining.
Installing the New Cutting Tools
Now that you’ve removed the old cutting tools, it’s time to install the new ones. Here’s how to do it:
1. Select the Correct Cutting Tool
Based on the specific machining operation you’ll be performing, select the appropriate cutting tool. Make sure the tool is the correct size, shape, and material for the job.
2. Inspect the New Cutting Tool
Before installing the new cutting tool, inspect it for any signs of damage or defects. Check the cutting edge for sharpness and ensure that the tool is properly ground.
3. Install the New Cutting Tool
Insert the new cutting tool into the tool holder, making sure it is properly aligned and seated. If necessary, use shims or spacers to adjust the height and alignment of the tool.
4. Tighten the Tool Holder Clamp
Using the appropriate wrench, tighten the tool holder clamp to secure the new cutting tool in place. Make sure the tool is firmly held but not over-tightened, as this can cause damage to the tool or the tool holder.
Testing the New Cutting Tools
After installing the new cutting tools, it’s important to test them to ensure they are working properly. Here’s how to do it:
1. Turn on the Lathe
Once you’ve installed the new cutting tools, turn on the lathe and let it run for a few minutes to warm up. This will help to ensure that the tools are properly seated and aligned.
2. Perform a Test Cut
Using a scrap piece of material, perform a test cut to check the performance of the new cutting tools. Pay attention to the quality of the cut, the surface finish, and the amount of vibration or chatter.
3. Make Adjustments as Needed
If you notice any issues during the test cut, such as poor surface finish or excessive vibration, make the necessary adjustments to the tool height, alignment, or cutting parameters. Repeat the test cut until you achieve the desired results.
Tips for Maintaining Cutting Tools
Proper maintenance of cutting tools is essential to ensure their longevity and performance. Here are some tips to help you maintain your cutting tools:
1. Keep the Tools Clean
After each use, clean the cutting tools to remove any chips, debris, or coolant. This will prevent corrosion and damage to the tools.
2. Store the Tools Properly
When not in use, store the cutting tools in a clean, dry place. Use a tool box or a tool rack to keep the tools organized and protected.
3. Sharpen the Tools Regularly
Over time, the cutting edges of the tools will become dull and need to be sharpened. Sharpen the tools regularly to ensure optimal performance.
4. Replace the Tools When Necessary
Even with proper maintenance, cutting tools will eventually wear out and need to be replaced. Replace the tools when they become dull or damaged to ensure the quality of your machining operations.
Conclusion

Replacing cutting tools on a heavy duty lathe is a critical task that requires careful attention to detail and a solid understanding of the lathe’s operation. By following the steps outlined in this blog, you can ensure a smooth and safe tool replacement process, and achieve optimal performance and safety from your heavy duty lathe.
Conventional Lathe If you have any questions or need further assistance with replacing cutting tools on your heavy duty lathe, or if you’re interested in purchasing a new heavy duty lathe, please don’t hesitate to contact us. We’re here to help you find the right solutions for your machining needs.
References
- "Machinery’s Handbook," Industrial Press Inc.
- "CNC Programming Handbook," Rectangle Press.
- "Metal Cutting Principles," Third Edition, by Peter Oxley.
Anyang Xinsheng Machine Tool Co., Ltd.
We’re well-known as one of the leading heavy duty lathe manufacturers and suppliers in China, featured by quality products and good price. Please rest assured to buy advanced heavy duty lathe made in China here from our factory. Contact us for more details.
Address: No.68 Renmin road, Anyang, Henan, China
E-mail: sales@anyangst.com
WebSite: https://www.xslathe.com/
