Alright, let’s cut right to the chase—if you’re here because you’re tired of dealing with wind-blown feed getting scattered, or your cattle rummaging through every last bit of hay and grain before you can restock, portable cattle feed barriers are basically your new farm BFF. I’ve been supplying these bad boys for years, and let me tell you, the installation process is way simpler than most folks make it sound. No fancy degrees, no crew of 10—just a few steps, some basic tools, and half an hour of your time max. Cattle Feed Barriers
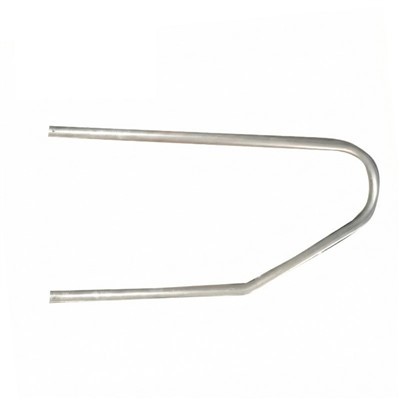
First things first, let’s get one thing straight: “portable” here isn’t code for “flimsy.” These barriers are built to hold up to rain, mud, a curious calf shoving its head under, even a storm that blows through out of nowhere. But their whole point is you can move ’em from the feed bunk to the sacrifice area to the winter paddock without breaking a sweat. So when you’re ready to set ’em up, skip the overcomplicated YouTube tutorials that make it look like you’re assembling a NASA rover. Let’s break this down like we’re chatting over a coffee between feeding rounds.
Step 1: Map Your Spot (No, Not the Whole Farm—Just This Feeding Area)
Before you even grab a single piece of the barrier, stop and check where you’re putting it. This isn’t rocket science, but it will save you headaches later. First, measure your feed bunk length—you don’t need a barrier that’s 2 feet longer than the bunk, because that’s just extra stuff to drag around. If you don’t have a bunk and you’re feeding in a loose area (like a round bale spot), aim for a straight line that’s about 6 inches wider than the space you want to keep feed contained. Also, take note of the ground. If it’s super muddy, you might need a couple of those small, heavy-duty ground stakes we include with every order—more on that in a sec. If it’s rocky? No sweat, we make our barrier bases wide enough to sit on top of small rocks without tipping. Pro tip: Don’t set it up in a spot where water pools when it rains—feed + standing water = mold, and nobody wants that (especially not your cattle, or your wallet when you have to toss spoiled feed).
Step 2: Unbox and Lay Out All Pieces (Don’t Skip This—Trust Me)
I know, I know—you’re eager to get going, and unboxing feels like a waste of time. But here’s the thing: we ship each barrier with pre-cut panels, a set of connecting pins, those ground stakes I mentioned, and sometimes a handy carry strap. If you unbox it on the grass and just dump everything, you might miss a pin that rolls under a tractor, or lay a panel on a rock and bend it (which is fixable, but why do extra work?). So spread all the panels out in a straight line near where you want the final setup. Each panel has these little loops on the ends, right? That’s where the connecting pins go. Don’t mix up left and right panels—each one is labeled with a tiny sticker (we do that for a reason) so you don’t get halfway connected and realize you have two lefts. If you’re getting multiple barriers for a longer bunk, now’s the time to line them all up end to end, no pins yet.
Step 3: Connect the Panels (This Is the Easy Part)
Okay, this is where it actually gets fun. Take two adjacent panels—hold them so the loops line up perfectly. Grab that metal connecting pin (it’s like a giant paperclip, basically) and slide it through both loops until it clicks. We design these pins to be snug, so you don’t have to worry about them falling out when a cow brushes past. If you’re using more than two panels, just repeat this until all are connected into one long, continuous barrier. Wait a sec—are there any gaps? Double-check the seams between panels. If there’s a gap bigger than a soda can, slide the pin in deeper or give it a little tap with a rubber mallet (no need for a sledgehammer—you’ll bend the pin). Here’s another thing: if your barrier has a “door” for you to walk through to refill feed, don’t forget to leave that section for last. The door panel usually has a little latch mechanism so you can open and close it without having to disassemble the whole thing. Super handy for when you’re carrying a 50-pound bag of grain and don’t want to climb over the barrier every time.
Step 4: Secure It to the Ground (No More Tipping, Even When a Bull Shoves It)
Now that your barrier is connected, it’s time to keep it from moving. This is the part where new customers sometimes cut corners, and then they’re calling me at 7 a.m. saying their barrier blew away in a wind gust. Don’t be that person. First, look at the base of each panel—there are these little holes (usually two per panel) for the ground stakes. Take each stake, line it up with a hole, and push it down into the ground. If the ground is hard (like packed dirt), don’t try to push it with your foot—grab that same rubber mallet and tap the top of the stake until it’s about 2 inches above the ground. That’s enough to hold it, but not so deep that you can’t pull it out when you want to move the barrier later. If you’re on concrete or a packed feedlot where you can’t use stakes? No problem—we sell optional heavy-duty weight plates that fit right over the stake holes and keep the barrier anchored. Just stack two plates per panel, and that thing ain’t going anywhere. Another pro move: if you have a round bale, you can even lean a half-used bale against the barrier to add extra weight—works like a charm if you don’t want to buy weight plates right away.
Step 5: Test It (The “Would a Cow Break This?” Check)
Before you dump feed and walk away, give your new barrier a quick test. Push on the top of the panel a little—should be sturdy, not wobbly. Give the end a gentle tug—shouldn’t slide across the ground. If you have that door, open and close it a couple times to make sure the latch works smoothly. If you notice a panel leaning, just adjust the stakes to the side it’s leaning into. If a pin is loose, give it a quick tap. This test takes like 30 seconds, but it saves you from coming back tomorrow to fix a barrier that got knocked over by a curious heifer. Also, take a quick look at the feed bunk inside the barrier—make sure there’s no feed piled up against the barrier bottom. If there is, that means a cow can reach under it to pull feed out, which defeats the whole purpose. Most barriers are 6 inches off the ground, so if you see feed there, just push it further into the bunk.
Wait, hold on—there’s one more “pro tip” I have to share, because it’s something I’ve been telling customers for years. When you’re done feeding for the day, take 5 minutes to wipe any mud or feed off the barrier panels. Feed and mud can get stuck in the loops and make the pins hard to pull out next time. That’s not a flaw in the barrier—that’s just basic maintenance, and it keeps it lasting for years, not months.
Now, let’s be real—some days are messier than others. If you’re setting this up in a snow-covered field? Same process, just push the stakes through the snow into the ground below. If you’re using it for a temporary calving pen? Disconnect the door panel and you’ve got a quick entryway for the vet. The best part about portable barriers is that they adapt to your schedule, not the other way around.
I get it—farm life is busy. You don’t have time to deal with complicated equipment that takes hours to set up. That’s why we designed these barriers to install in under 10 minutes, no special skills needed. I’ve had customers tell me they installed one while their coffee was still hot. If you’re not sure about anything—whether you need to double-check how many panels you need for your bunk, or you have questions about the stakes or weight plates—don’t guess. Reach out to our team; we know this stuff inside and out, and we’ll talk you through it step by step. We don’t do pushy sales calls—we just want to make sure you’ve got the right gear to make your job easier.
At the end of the day, a portable cattle feed barrier isn’t just another piece of farm equipment. It’s a way to cut down on feed waste (saving you money), keep your cattle from fighting over feed, and make your feeding routine a little less stressful. The installation process is straightforward, the maintenance is minimal, and it’s one of those investments you’ll wonder how you lived without once you start using it.

If you’re ready to get set up, or you have questions about what size or type of barrier works best for your setup, don’t hesitate to connect with our team. We’re here to help you figure it out, no pressure.
Cattle Water Drinkers References
- Agricultural Safety and Health Bureau, U.S. Department of Labor. (2021). "Portable Farm Equipment Installation and Maintenance Guidelines."
- National Cattlemen’s Beef Association. (2022). "Feed Management Solutions for Small and Mid-sized Operations."
- American Society of Agricultural and Biological Engineers. (2020). "Standard for Portable Livestock Handling Equipment Performance."
- University Extension Services, Land-Grant Universities. (2023). "Low-Cost Feed Containment Strategies for Pasture-Based Cattle Systems."
Hebei Honde Industrial Trade Imp & Exp Co., Ltd.
With abundant experience, we are one of the most professional cattle feed barriers manufacturers and suppliers in China. We warmly welcome you to wholesale high quality cattle feed barriers for sale here from our factory. We also accept customized orders.
Address: Room 1904, Yintai International Building, No.36 Guang’an Street, Shijiazhuang, Hebei, China
E-mail: Helen@hbhonde.com
WebSite: https://www.hondelivestocksupply.com/
